The Exterior And Interior Features Your Home Has To HaveBuilding your own home can be exciting yet stressful. There are tons of decisions to be made and a budget to consider. One of the most important decisions a homeowner can make will be to design a home that is energy efficient. Planning your home with these energy saving features takes advantage of the most recent building technology and must be installed while the home is being built. Most importantly, you are helping to protect the environment while saving yourself money.
EXTERIOR FEATURES Advanced House Framing According to toptenreviews.com, advanced house framing is a new technique which uses less wood and more insulation. "According to the U.S. Department of Energy, using advanced framing can lower material costs by $500 to $1,000 for a 1,200- to 2,400-square-foot house. It can also cut labor costs by three to five percent and annual heating and cooling costs by up to five percent." Cool Roofs These roofs are especially designed for homes in warmer climates where the air conditioning is used most of the year. The roofing material is made from a reflective material built into the the shingles, or tiles. These roofs are designed to reflect sunlight and lower roof temperatures. Exterior doors and Windows Exterior doors come with energy performance ratings. This score will let you know how well the door keeps heat or air conditioning inside. Energy efficient windows are a smart investment on the part of a homeowner. According to Department of Energy studies, new energy efficient windows can save the average homeowner between 10% and 40% on their energy bill. Low emissive (Low-E) windows keep heat inside while facilitating daylight to pass through. Not only that, but they allow A/C units to operate more efficiently, and can prevent fading of fabrics, floor coverings and furniture from sunlight. Skylights Surprisingly, skylights can improve a home's heating, lighting, and ventilation. The U.S. Department of Energy recommends that skylights be no larger than 5% of the floor area in rooms with several windows, and no more than 15% of the floor area in rooms with minimal windows. Exterior Paint A home's paint color can have an impact upon heating and cooling. A lighter color will help keep your home cooler, while a darker color will help your home retain heat. Air Management Tight construction which minimizes air leaks can help decrease heating and air conditioning costs by 15 percent, according to the Environmental Protection Agency. Properly sealed ductwork inside prevents air leaks and condensation, and tight airways leading outside can reduce energy bills. All joints where walls, floors and roofs come together need to be properly sealed. Weather stripping around doors and windows reduces air flow and prevents dust from coming inside. INTERIOR Water Heating According to The U.S. Energy Information Administration in a 2009 Residential Energy Consumption Survey, water heating can account for almost 20 percent of a home's total energy use. Consider an energy-efficient water heater with thicker side walls with higher insulation values. Insulation Insulation helps keep a home stay cooler in the summer and warmer in the winter. The R-value of insulation tells you how well it will resist heat transfer. The higher the R-value, the better the heat resistance. Homes may have a combination of insulation types packed into ceiling, wall and floor cavities such as blown and batt insulation. Some types of insulation are specifically designed for certain areas or certain types of homes. Flooring Choosing the correct type of flooring can impact your energy costs. Rugs and carpet can trap heat, keeping your home warmer in the winter. Choosing the correct flooring will help keep your home warmer or cooler, depending on your needs. Fans Installing fans in your home can help save on air conditioning costs. Ceiling fans come in a large selection of colors, styles, and shapes, and can add to the decor of your home without looking out of place. Ceiling fans can also be dialed to help keep warm air from rising but circulating closer to the living spaces. Appliances and Fixtures When purchasing appliances and fixtures, check out each's Energy star rating. High Energy-star ratings on an item indicates its energy savings. According to energystar.gov, Products can earn the ENERGY STAR label by meeting the energy efficiency requirements set forth in ENERGY STAR product specifications. EPA establishes these specifications based on the following set of key guiding principles:
A programmable thermostat will allow a homeowner to save heating and cooling costs by allow them to set the thermostat to adjust for changes in temperature, especially during the day when the home may be empty. It can be set to increase or lower the temperature before the arrival of the homeowners, thereby making the home more comfortable. Energy-Efficient Light Bulbs Light Emitting Diode (LED) and Compact Fluorescent Lights (CFL) bulbs have revolutionized energy-efficient lighting. LED bulbs last up to 10 times as long as compact fluorescents, and far longer than typical incandescents. They are durable, cool (do not heat up), mercury free, and more efficient than regular light bulbs. The are more cost effective when calculating the replacement factor of regular light bulbs. CFL bulbs are four times as efficient and last ten times longer than regular light bulbs. They are less expensive, reduce water and air pollution, provide high quality light and are more versatile than regular incandescents. Induction Cooking Stove Induction cooking stoves can reduce energy use by up to 60% over other cooking stoves by using an electromagnetic mechanism to convert electric current into heat energy with less energy being consumed. Planning for an energy-efficient home while in the design stage of home building will reap rewards in energy savings. By taking the time to research those features which will save you money over the course of the years you live in your home, you are taking advantage of all the technological advances being made in home construction. Harper Construction> specializes in high-end construction and remodeling. Browse our entire portfolio of homes at Houzz.com. The Harper Construction team> is a collection of industry professionals and craftsmen who all have the experience, dedication, and knowledge to make your project a successful one. We hope you found this information informative and helpful. If you found this information helpful , click "Like" or "Share" below and post this to your social media pages. Your "Likes" and "Shares" help others like you find the information they need. We are happy for you to re-publish this article on your website or in your company newsletter with credit to Harper Construction as the author and a link to our website, chrisharperconstruction.com. The URL for this article is http://www.chrisharperconstruction.com/blog/energy-efficient-features-every-home-should-have. Email us with any questions.
14 Comments
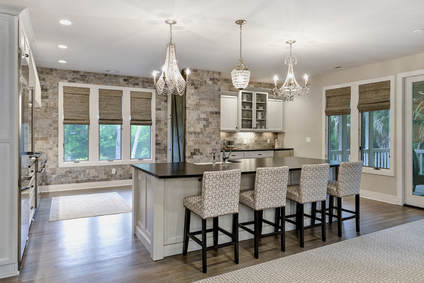
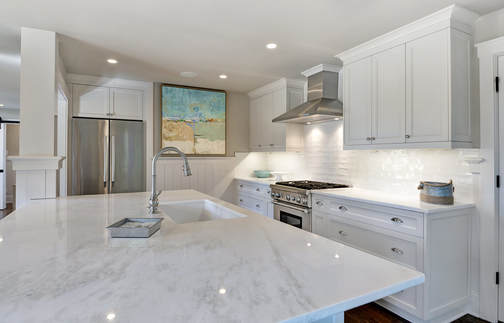
15 Features Your Kitchen Has To HaveThinking of remodeling your kitchen? Every person who has ever renovated a kitchen will tell you is that having a plan up front will save you time, money, and stress. That plan should include the must-have features for your kitchen. If your list should include "would-like-to-have" features, even better. Here are some suggestions to help you plan your perfect kitchen.
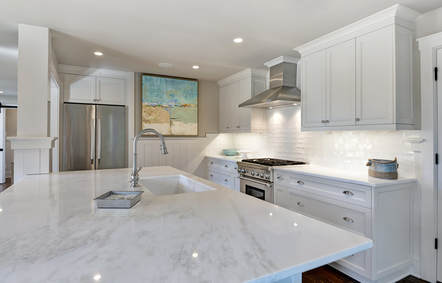
1. DOUBLE OVENS Who wouldn't like built-in double ovens? Not only do they add style to your kitchen, they provide two ovens you can use without bending over. You can bake in the first oven and use the second oven for warming or additional baking. Built-in ovens will also allow you to be creative in your floor plan in terms of where your cooktop will be placed. 2. ISLAND COOKTOP An island cooktop can be built into a large island, providing generous work surfaces and room for a warming drawer or other amenities below. A view-blocking range hood is not needed because of a downdraft exhaust system. 3. COMMERCIAL-STYLE RANGE If you choose this feature, you can expect a range with three to four times the BTU output of an ordinary stove. 4. DOUBLE BOWL SINK Double bowl sinks are handy when washing and rinsing dishes and pans. This item was the most controversial item on must-have lists because there are many who wanted the huge single bowl sink for washing cookie sheets and stockpots. 5. PREP SINK WITH DISPOSAL OR TWO SINKS A prep sink is an excellent addition to your kitchen when preparing fruits and vegetables. This keeps one person in the kitchen from taking up all the sink space. Another idea is to have two separate, full-size sinks; one large single and the other a large double, both with disposals. This may take up more space but with a large family or frequent entertaining two sinks would be extremely useful. 6. TWO DISHWASHERS This is also a useful idea for large families or frequent entertainers. If you feel two full-size dishwashers are excessive, consider building a single dishwashing drawer along with the full-size dishwasher. There are creative ways to place a small dishwasher in a pantry or at different ends of an island. 7. DISHWASHER IN A DRAWER A drawer dishwasher can be used in place of a regular dishwasher or in addition to a full-size dishwasher. This could be installed in a butler's pantry, game room or near a prep center. It looks like a regular drawer and pulls out for easy cleanup. 8. POT FILLER This is a popular feature which places a cold water faucet high on the kitchen backsplash, usually over the stovetop, in order to fill large pots with water. 9. BUILT-IN REFRIGERATOR AND/OR ICE MAKER Built-ins add style and keep an integrated look to your kitchen. Ice makers that come with refrigerators may have a small capacity, and not taste as good as a freestanding ice makers. 10. COUNTER-DEPTH REFRIGERATOR A Counter-depth refrigerator is less deep, but usually taller or wider than standard refrigerators. They sit nearly flush with standard base cabinets, which makes for a built-in look. 11. ON-COUNTER GARAGE This is like a garage for a car only its houses an appliance which is used often but would like kept out of sight. Usually they have a roll-up door, which leaves counters empty in front. Plan ahead to determine which appliances you want out of sight, don't forget outlets so that you can simply slide out the appliance when needed. 12. WARMING DRAWER This is a great feature for busy households. These do require a reinforced cabinet with power and may be heavier than other drawers. Most warming drawers range in size from 27 to 30 inches wide and 11 to 12 inches high. 13. WASTE AND RECYCLING CENTER This is one feature you will probably use everyday. Your recycling center will allow you to keep the recycling and trash hidden away until it's ready to be taken out for pickup. 14. DEEP DRAWERS/FULL EXTENSION DRAWERS WITH DIVIDERS Deep drawers next to the kitchen range which house large cooking pots and pans are extremely convenient. Hardware that will allow drawers to slide open all the way will also make it easier to get objects in and out and keep them neat and orderly. Internal drawer dividers will help with organizing kitchen utensils and provide a finished look to your cabinetry. 15. HOME OFFICE SPACE WITH TV If possible, make room for a home office or media center. This space can be used to access recipes online or provide a space for kids to do their homework. A television allows you to see the news while you cook. Harper Construction> specializes in custom, high end construction and remodel projects. Check out our porfolio of work on Houzz>. Harper Construction has a reputation for quality custom construction, attention to detail and strong customer service. If you are ready to start your project, or just want to discuss your ideas, please give us a call. If you found this information helpful, click "Like" or "Share" below and post this to your social media pages. Your "Likes" and "Shares" help others like you find the information they need. We are happy for you to re-publish this article on your website or in your company newsletter with credit to Chris Harper Construction as the author and a link to our website http://www.chrisharperconstruction.com/about.html. The URL for this article is [article URL]. Email us with any questions. The 9 Phases To Remodeling A KitchenMany people start a kitchen remodel in order to have it finished by a certain date (a holiday, wedding, guests arriving, etc.). How long it will take to complete your remodel certainly depends on the size of the kitchen and how extensive the remodel will be. However, the average kitchen takes between four to six weeks to remodel. This does not include the planning stage where the designing phase happens.
It's important that homeowners take their time to plan and design their new kitchen. There are dozens of decisions to be made from choice of cabinets, to appliances, to drawer accessories. This is the phase of the project where homeowners will make the decisions which will determine the budget. Making changes later may have a drastic affect on the timeline and the budget. Planning and design will include finding out which products will require a long time period for ordering. According to chicagohome.donatellibuilders.com, products such as custom cabinetry, some tile and stone products, or furniture may require three to four months to build and ship. Semi-custom cabinets take between four to eight weeks, while ready-made cabinets can be on site within a few days of placing the order. It is wise to select the slab of granite desired ahead of time in order to see the color variations in the veining. It is now time for the actual remodel which has 9 phases: 1. Removal of the Existing Kitchen (Approximately 2 days) This phase will consist of removing appliances, cabinetry, countertops, etc. It is during this time that your contractor will assess the condition of the walls, ceiling and floor. Corrections that need to be made for out-of-level floors or ceilings, faulty plumbing, electrical wiring, etc. will require consulting with the homeowner of where and how to proceed. 2. Determine location of Outlets, Light Fixtures and Appliances (Approximately 1 day) During this phase the planning for electrical outlets, lighting and appliance power feeds are determined. This process needs to be exact to be sure that they are correctly placed and not have to be moved later. 3. Plumbing, HVAC, and Electrical Installation (Approximately 5 days) If there is any heating or HVAC ductwork to be done or moved, this may need to be coordinated with the plumbing and electric contractors. This may be specific to the job because of wall removal/construction or range hoods being installed. Time needs to be allotted for mechanical inspections. 4. Drywall, Insulation, Priming (Approximately 3 to 4 days) Installing insulation and sheet rock should take one to two days. Taping and spackling usually takes three days but can sometimes take longer depending on the drying time. 5. Flooring Installation (Approximately 3 to 6 days, depending on materials) A typical wood floor may take one day to lay down, one day to sand and stain it and one more day to urethane. Typically three coats are used so there will be a drying day with each coat. Ceramic tile would include the cement that goes down first, then the tile. Usually the grouting is done on the third day with a drying day, so a tile job may take three to four days. If radiant heat is being laid down under the tile, you have to add two more days to the process because the tarpaper and wire needs to be laid down by the tile installer before the plumber comes back to lay all the tubing. 6. Countertop Templating and Cabinet and Countertop Installation (Approximately a couple hours to 10 days) The templating only takes a few hours, however, it may take a week to ten days for the countertop is made and fabricated off site. The fabricator needs time to laser-measure the granite perfectly, before it is sent to the fabrication crew for slab preparation. It is then delivered and installed at the job site. Cabinets will usually take five days to set, depending upon the size of the room and details. 7. Plumbing and Electrical Hook Up (Approximately 1 to 2 days) Plumbers come in to hook up the sinks, faucets, dishwashers, and other appliances. The electrician will then install all the outlets and hook up all the appliances. 8. Backsplash and Painting (Approximately 2 days) A tiled backsplash will usually take a day and then be grouted the next day. Painting is usually last, allowing the for the right amount of drying time in between coats. 9. Punchlist This is the completion of all the final details. The kitchen should be complete. Most contractors have a method which determines the logistics of the way they schedule and coordinate a kitchen remodeling. Of course, the size and complexity of the project will impact this coordination, but the correct planning and design will keep the budget on track and delays minimized. Harper Construction> specializes in high-end construction and remodel projects in the Charleston, SC area. They have the expertise to answer all of your questions or you can browse their entire portfolio of work on Houzz>. Their work has been featured in Charleston Magazine and Charleston Style and Design as well as in style and design publications both local and national. If you found this information helpful click "Like" or "Share" below and post this to your social media pages. Your "Likes" and "Shares" help others like you find the information they need. We are happy for you to re-publish this article on your website or in your company newsletter with credit to Chris Harper Construction as the author and a link to our website http://www.chrisharperconstruction.com/. The URL for this article is [article URL]. Email us with any questions. Design Build and Design Bid Build are two very different construction delivery methods used in today's building process.
According to Wikipedia, Design/build: Under this method, an owner typically hires a single entity, the design/builder, to perform both design and construction under a single contract. Design-bid-build: This is the most traditional process in the U.S. construction industry, where the owner contracts separately with a designer and a contractor. What does all of this mean? Is one method superior to the other? Determining which project delivery method is one of the most important decisions made by every homeowner starting a construction project. Having a good understanding of the choices available and the importance of each choice is important because of the impact on the three parties involved: owner, designer, contractor. Project considerations such as budget, schedule, design process, and risk assessment will impact the delivery method selected. DESIGN-BID-BUILD In the Design-Bid-Build, (DBB) the owner has to find each company separately, the architect and general contractor have no connection until the plans are placed up for bids. This traditional U.S. project delivery method involves three sequential phases: the design phase, by the designer of record for the project, the bid phase, when a contractor is selected, and build or construction phase, when the building is done by low bid contractors. Because of this lack of integration, it takes more time for the project to be completed from start to finish. Each phase must be completed before the next phase is started. Additionally, in Design-Bid-Build there are two separate contracts: owner to designer and owner to contractor. Although this method is widely used and understood, the owner has a huge responsibility for the success or failure of the end product. The contractor and designer work directly for the owner. Not having construction input into the design may limit the effectiveness and viability of the design. Also, the types of materials specified and the construction methods may be made without input from the construction perspective because there is no contractual relationship between the contractor and the designer, and there is no opportunity for collaboration during the design phase. The owner is responsible for "gaps" between the plans and specs and this may cause adversarial relationships rather than than cooperation among the owner, contractor, and the designer. DESIGN-BUILD In the Design-Build (DB) method, there is a joint venture between the general contractor and the designer. There are two prime players: owner and design-build entity. There is one contract, owner to design-builder. This makes for one point of contact by the owner, the design builder. Responsibility for design and construction of the project to meet the performance standards set forth by the owner in the contract is the design-builder. There is greater cost savings because the contractor and designer are working together throughout the entire process resulting in fewer changes. Design builders have access to the most recent construction costs resulting in designs which are created with the most cost-effective materials and methods. Because all parties are agreed, this allows fast track schedules and on-time delivery. Eliminating the bidding process can save a significant amount of time because site preparation can begin prior to the finalization of all building details. Design Build is less risky to the owner because only one entity is held accountable if problems occur. Change orders are usually limited to owner changes. If the owner has questions or concerns, they will only have to contact the design builder. Despite the fact that Design Bid Build is the commonly used project delivery method, the advantages of the Design Build method make this delivery method easier, faster, cheaper, and with less risk to the owner. Harper Construction has the expertise to answer all of your questions concerning your building project, or you can browse our entire portfolio of work on Houzz. The Harper team specializes in high-end construction and remodel projects in the Charleston, SC area. Harper Construction's reputation for quality construction and craftsmanship are well-known, and their work has been featured in Charleston Magazine and Charleston Style and Design, and Harper projects have been featured in style and design publications both local and national. Follow Harper Construction on Facebook>! If you found this information helpful click "Like" or "Share" below and post this to your social media pages. Your "Likes" and "Shares" help others like you find the information they need. We are happy for you to re-publish this article on your website or in your company newsletter with credit to Chris Harper Construction as the author and a link to our website http://www.chrisharperconstruction.com/. The URL for this article is http://www.chrisharperconstruction.com/blog/what-is-a-design-build-and-why-choose-it-over-the-design-bid-build-process. Email us with any questions. Adding an addition to your home can be an exciting yet intimidating prospect. Many homeowners have decided that building an addition to their existing home is preferable over moving to another home. Perhaps they love the neighborhood, want to stay in the same school district, or like the proximity to work, shopping or medical needs. Whatever the reason, they have decided to stay put, but need more space.
The national average cost of building an addition is $41,726, with most homeowners spending between $21,000 and $64,000. An addition to your home is a huge investment in time and money so it will pay to become as knowledgeable and organized as possible about all aspects of the project. The Cost Factors For Services, according to homeadvisor.com are as follows:
Having a clear vision of what you want and need will be the first step in your planning. Deciding whether you are building out or up will come with its own positives and negatives and will impact many of the decisions you need to make. No matter if you build out or build up, this is a major construction project with average costs running approximately $80 to $200 per square foot. Don't forget to check zoning restrictions. Building Out Building out involves increasing the footprint of your home by extending your house's perimeter outward. The advantages are less disturbance to the rest of the home, while having to pour a new foundation. A disadvantage would be the decrease of yard square footage. Consider also that a zoning variance may be required depending upon local regulations. Building Up Building up involves adding space to the existing footprint of the house. While a new foundation is not needed, strengthening of the existing foundation may be required to support the extra weight. Here again, local regulations may limit the height of your home, and a staircase may need to be added. Types Of Additions Sunrooms can be a budget-friendly way to add space to a home with average costs running $16,315 for the average sunroom. The amount of space, location of the sunroom and the addition of electrical wiring and heating can add to the costs. Electricians charge an average of $50-$100 per hour. Carpenters charge an average of $70 per hour, and painters usually charge $20 - $35 per hour. Detached additions such as guesthouses, detached garages or other types of additions run around $15,000 to $24,000 on average. Factors such as whether or not you are buying a prefabricated addition or building it from the ground up, possible excavation, and exterior design will all have an impact on the cost. Most homeowners will want the addition to add value to their home in terms of resale value so doing the job correctly and within budget is important. According to homeadvisor.com, The Return On Your Investment Is As Follows: 49% for sunrooms 53% for bathrooms 63% for master suite additions 65% for two story addition with upstairs master suite and a downstairs living area Additions may return less on your investment than remodels. However, adding significant square footage to your home or adding rooms such as bedrooms and bathrooms may show a higher return on your investment. Where To Start? One of the first steps in adding an addition onto your home is to get everything in writing from your contractor. Agreeing on the total cost before going forward is vital. Make sure they are licensed and insured and check references. Contractors will usually expect some advance money and then again after specific goals in the project are reached. Advancing too much money could put the homeowner at risk, but advancing too little could put your contractor at risk. These terms need to agreed upon in writing before any work is started. Find out what your contractor's policy is on changes. During construction, the homeowner may change their mind about the layout, the fixtures to be used or even colors. Another consideration is that the contractor may run into unforeseen problems which may have a big impact on the budget. These contingencies need to be addressed in writing before the construction is started. Hiring an architect for your project is another consideration. The size and complexity of your addition will determine whether an architect is needed. Using an architect will certainly add to the cost, however, the finished project may be worth the cost. Hiring an architect will insure that your budget estimates will be more exact and construction is done in a way that blends in with the style of your home and adds to the resale value. Remember that an addition will most likely involve exterior work. The cost of siding and roofing materials plus landscaping costs all add to your budget. Adding an addition onto your home can be a daunting prospect. However, with the correct planning and the right professionals, your project can add to the beauty and functionality of your home. Harper Construction specializes in high-end custom construction and remodel projects. Our reputation for quality construction and attention to detail have made us a five- time " Best of Houzz" award. Browse our entire portfolio of homes at Houzz.com. If you found this information helpful click "Like" or "Share" below and post this to your social media pages. Your "Likes" and "Shares" help others like you find the information they need. We are happy for you to re-publish this article on your website or in your company newsletter with credit to Chris Harper Construction as the author and a link to our website http://www.ChrisHarperConstruction.com/. The URL for this article is http://www.chrisharperconstruction.com/blog/the-cost-of-adding-an-addition-onto-my-home. Email us with any questions. The Facts about Open floor Plans and Traditional Floor plansDeciding upon a floor plan for your new or newly renovated home means more than just the aesthetics. The floor plan you select will influence construction costs, traffic flow, natural light, and activity level. Keeping in mind the size of the space, the amount of people using the rooms, their preferences, and the primary uses of the rooms, will determine if homeowners want an open floor plan, a traditional floor plan, or a combination of both.
First, let's define what an open floor plan means. Generally, an open floor plan involves one or more large open rooms which has more than one function. This means that a family room can incorporate a kitchen and dining room in one large, open space. According to budgetdumpster.com, Open floor plans have the following advantages: 1. CREATE AN ILLUSION Open floor plans can make a small area feel much larger. In smaller homes, this type of floor plan can make an older home feel new. 2. DESIGN FLEXIBILITY A big, open area will allow you to buy that larger size furniture that would crowd a smaller room. This will allow homeowners greater design flexibility. 3. PROMOTES INCLUSIVENESS An open floor plan allows family members to interact with each other while being in other parts of the room, engaged in different activities. 4. BABYSITTING Parents will be able to keep an eye on their children while preparing dinner or setting the table. Children will have more room for their activities, but still be kept safe and out of trouble. 5. ENTERTAINING An open floor plan allow for a greater number of guests in one space while allowing groups to gather in different areas for different activities. 6. NATURAL SUNLIGHT An open floor plan means fewer walls which allows for more sunlight while saving energy. As you can see, open floor plans have many advantages and are currently very popular with designers. In terms of resale value, open floor plans rate very high in today's housing market. Traditional floor plans have their advantages, also. Many of the homes built before the 1990's have a traditional floor plan. This allows for rooms to be more functional and private. These are the advantages to a traditional floor plan: 1. EXPENSE Knocking down walls can be expensive, especially if the wall being removed is a load bearing structural wall. This means that this wall may carry the weight of the house roof or the floor above. When working with a structural wall it may entail hiring a contractor and/or an engineer and get approval from the local city. 2. PRIVACY Walls and doors allow you to keep that area private. Homeowners are able to contain messes or private items from surprise guests. Smaller rooms are easier to clean and maintain. 3. WALLS Open floor plans have few walls. Traditional floor plans allow you to decorate and hang artwork and important photographs to display. For some artwork, open sunlight can be harmful. 4. SPECIALTY AND FUNCTION Traditional floor plans allow you to have specific rooms for specific functions such as offices or craft rooms. Homeowners can create a room just for their own purpose and allow or not allow guest access. 5. NOISE Having walls will keep the noise of a dishwasher or television from traveling to the other parts of the house. This type of floor plan will allow one area of the home to entertain guests while allowing privacy in another part of the home. Traditional floor plans also offer a great many advantages. In some newer homes with traditional floor plans, heat and air conditioning to be turned down or off, resulting in energy savings. The good news is that homeowners don't have to pick one or the other. Very often open floor plans are the choice for the main level of the home while a traditional floor plan is used for the upper level or bedroom area of the home. Keep in mind that as children grow up, room configuration may need to change. The important thing to remember is that if the current floor plan in your home is not meeting your needs, it can be changed to reflect how your home functions today. Here are some ideas how to change an open or closed floor plan into more usable, functional space: 1. Extra or unused attic, basement or garage space can be turned into additional bedrooms, an office, or family room. 2. Two adjacent bedrooms can be combined to make one large bedroom. 3. Add bathroom by borrowing space from a larger room. (It helps if it is close to plumbing) 4. Increase the size of a bathroom by expanding into a linen closet or storage space. 5. Converting decks or balconies into interior rooms can add space to small rooms. 6. A patio already has the foundation for a new room. 7. Flat roofs can be converted into a deck or covered porch. 8. A sunroom can be converted into a new room or add space to a room. Whatever floor plan you choose, before you start, make a list of the priorities you desire in your home. Your list should include the rooms where your family seems to congregate the most and any specialty rooms needed. In smaller homes look in crooks and crannies for creative ways to add drawers, shelves, closets, or cabinets for more storage space. Harper Construction> has built a reputation for fine quality custom construction, attention to detail and, strong customer service. Check out their entire portfolio of work on Houzz.com>. If you found this information helpful click "Like" or "Share" below and post this to your social media pages. Your "Likes" and "Shares" help others like you find the information they need. We are happy for you to re-publish this article on your website or in your company newsletter with credit to Harper Construction as the author and a link to our website http://www.chrisharperconstruction.com. The URL for this article is http://www.chrisharperconstruction.com/blog/open-floor-plan-vs-traditional-floor-plan Email us with any questions. 4 Steps To Updating Your KitchenHaving a beautiful, functional and efficient kitchen is every homeowner's goal. Getting to your goal is what makes it interesting. According to hgtv.com, the average kitchen renovation costs between $20,000 and $50,000. Designing a layout, finding a contractor, subcontractors, choosing countertops, flooring, and picking the right appliances, might all seem daunting. However, with a plan in mind and a few steps to follow, you can have the kitchen of your dreams.
1. FINDING A CONTRACTOR Finding a qualified, reliable, and expert contractor is essential to updating your kitchen to your satisfaction. Very often contractors are chosen based on their reputation. However, contractors switch subcontractors or laborers which can affect their finished product. Ask your three top candidates to supply references and try to visit a job in progress. You can learn a lot about a contractor when you see for yourself their job site and work in progress. According to thisoldhouse.com, these are four essential questions to ask references about your contractor candidates:
2. PLAN THE LAYOUT After choosing your contractor, the next step will be to plan your kitchen's layout. Before seeing a professional designer, have an architectural rendering or to-scale drawing of your current kitchen, indicating the location of windows, doors, heating, plumbing lines, and electrical outlets. (You can do this yourself with the National Kitchen and Bath Association's website, nkba.org). Also, include a detailed list of your "must-haves" and "would-like-to-haves." Another helpful tool to have is a folder with pictures of rooms, lists of products and materials and any architectural details that appeal to you. An experienced designer will save you time, money and headaches by sitting down with you to help you plan the layout of your kitchen based on:
Keep your design functional with features that will help to simplify your daily life. Most people rarely cook elaborate meals for everyday life so spend your money on appliances that are energy-efficient and, easy to clean. Look for ways to minimize the clutter from daily living that accumulates by using adjustable shelving or cubbies with bins. Choose quality materials which will last and add resale value to your home. 3. CABINETRY AND COUNTERTOPS When choosing cabinets for your kitchen, think beauty, durability and function. Cabinets are not only the focal point but they are also one of the most used elements of your kitchen. Today's cabinets don't have to be made out of wood. From glass cabinets to open shelving, to ecofriendly, your choices in styles and colors are endless. There are even flip-up doors, pocket doors and corner drawers which can help make your cabinets more functional. Consider a countertop hutch to add style and storage to your kitchen with a perfect place to show off your pretty dishes. An island workstation can add more storage and workspace, especially if it includes a prepsink or cooktop. To add architectural interest, add decorative supports, aprons, corbels and toe kicks. Mix and matching two different cabinet styles is a popular trend today which shows no signs of stopping. Granite continues to be a favorite countertop choice Thickness can determine the cost. However engineered stone such as quartz surfaces are increasing in popularity. Other choices are ceramic tile, Corian, stainless steel, concrete, soapstone and laminates. Keep in mind that the higher-end materials will have a higher resale value for your home. A heavier countertop material demands cabinetry that will stand up to this weight over time. Countertop choice may dictate cabinet choice. 4. FLOORS, WALLS AND CEILINGS Backsplash material choices are mind-boggling. From glass and ceramic tile to stainless steel, Copper or tin tile, chalkboard paint, stone, marble or limestone to wallpaper; the choices in color and texture are endless. The choices for floor materials are almost as many. Coffered or shiplap ceilings add architectural impact, but remember that recessed lighting or hanging pendant lights will impact your ceiling update. It is important that the elements in your kitchen feel cohesive. Coordinating doesn't mean matching but that everything feels part of a whole. Choose colors and materials that are classic such as white subway tile or neutral colored tile or stone. Pick a hue that will be your primary color and use different shades, tones, or tints of that color in your design. We hope that this this information has been helpful and informative. Harper Construction has the expertise for all of your remodeling needs. Their reputation for fine craftsmanship and attention to detail is reflected in their 5-star Houzz rating. Check out their portfolio of work on chrisharperconstruction.com. If you found this information helpful click "Like" or "Share" below and post this to your social media pages. Your "Likes" and "Shares" help others like you find the information they need. We are happy for you to re-publish this article on your website or in your company newsletter with credit to Chris Harper Construction as the author and a link to our website http://www.chrisharperconstruction.com/. The URL for this article is http://www.chrisharperconstruction.com/blog/kitchen-remodel. Email us with any questions. According to The National Hurricane Center, the “two most efficient ways of staying safe during a hurricane are preparing in advance and then acting on those preparations." Hurricane Irma is currently a Category 5 storm with winds gusts over 180 mph. Florida has already declared a state of emergency and Georgia and South Carolina could be in its path.
The first priority should be the safety of your family. Make a family plan and go over it with your family. Don't wait until the last minute. Cell phones may not be operable or left behind. FEMA recommends keeping an emergency supply kit on hand at all times — especially when the threat of a severe weather event arises. The kit should include:
In addition to the emergency kit, every family should develop an emergency plan which includes:
If there is no mandatory evacuation in place, keep your car in good working order with a full tank of gasoline. If an evacuation order comes, leave immediately with your emergency kit. If you stay in your home, avoid lighting candles. Flashlights with extra batteries should be part of your preparation. Also, keep your cell phone charged as long as possible. Before the power goes out, turn your freezer and refrigerator to the coldest settings 6 hours before the storm hits and move as much food as possible into the freezer because the food will last longer. Avoid opening the refrigerator and freezer doors as much as possible to keep the cold air in. Freezing ice packs for coolers is another way to prepare for power outages. Portable generators are an important addition to your preparations. Read all directions about their use and protect them from moisture. Keep them outside away from windows and doors. FEMA also recommends filling sinks and bathtubs with water for use in flushing toilets or washing. Home preparations include making sure rain gutters are secure to the house, clearing clogged drains to prevent water buildup and, if possible, stockpiling sand bags, plastic sheeting and plywood. Install sump pumps with backup batteries and a water alarm to let you know when the system is overloaded. More costly, and long term preparations can include waterproofing your basement, elevating your heating system, water heater and electric panel above flood water height. Unplug appliances and move items such as furniture and valuables which are light enough to carry to higher floors of your home. Reinforce doors, windows, walls and roofs beforehand as much as possible. Taping windows is not a good option since glass could break into larger shards. Bring in any outdoor furniture and anchor items such as propane tanks. Trimming and removing damaged trees and low-hanging limbs will reduce the risk of them causing damage, and if available, install storm shutters. Take photos of your house and its belongings before the storm. After the storm hits, take as many photos as possible of the initial damage and prevent additional damage by covering ceiling holes with tarps. Some insurance plans may not cover losses sustained after the storm. After the storm:
Harper Construction hopes that this information was helpful and hope you and your family stay safe during this hurricane season. Please “Like” and “Share” this information with all your friends and family. All the questions you need to ask while building your dream homeAre you planning to build your dream home? Do you have a picture in your mind of the perfect home? Whether it's large or small, simple or grand, the fun part is creating a plan for your dream home. Everything will be new and reflect you. Don't be afraid to dream big. This is where you put all your ideas, hopes and creativity to work. There will be time later for the practical, but now plan your home to reflect who you are, how you want to live and what priorities you have.
1. BRAINSTORM YOUR IDEAS This can be as simple as starting with a list of "must haves," and "would likes." List the features you want for each room and even make rough sketches. Don't forget to think about the future and what changes may be coming down the road. Do you have children, or are you planning for a family? Will you need more room for taking care of elderly parents, or will you be downsizing in the near future? Do you work from home, or will you need to provide a space for a workshop or workroom? These are all decisions which will impact your brainstorming of ideas. Stay organized with a software application or even a computation book and keep it handy until your home is completed. You can post quotes, photos, important phone numbers, ideas, and any other details pertaining to the project. 2. LOCATION Where do you want to live? Many times, those who are planning to build a home already have a property chosen. However, if this is not the case, consider your options. Do you want to live in the country, the suburbs, or the city? Do you want to be close to shopping, medical facilities, or work? Visit your favorite neighborhoods and list the reasons they are your favorite. Consider the topography of the land. Will your budget support a water, mountain, or forest view? A heavily wooded or hillside landscape has a different set of architectural requirements and design challenges than flat ground. Check out the access to utilities and other services as well as areas near noise-producing areas such as freeways, airports, or railways. It may be wise to check with a real estate professional for any zoning, HOA, or variance requirements. 3. BUILDING PROFESSIONALS Your home is most likely your largest investment. Using a team of building professionals is a priority. Your architect and builder (may be the same person) will be your guides throughout this process and will make sure that your dream home is completed on time and within budget. In addition, your building professionals will be able to bring your ideas into the design process. You may want to add a kitchen and bath designer, an interior designer and a landscape architect. These professionals will also be aware of all local and state codes. Do your homework when hiring these professionals, look at their previous work and ask for references. 4. FLOOR PLAN There is software available that will help you plan your home's layout; walls, windows, etc. Smart Draw is a free software that can help you design a room or your entire home using symbols and templates. For more ideas, attend open houses and look at the homes in the neighborhoods that you love. Take photographs of homes and buildings you like, in order to remember those details that stood out. Use your vision and creativity to come up with a rough floor plan that reflects you and your family's priorities. Consider the traffic flow and the rooms most used in your design. Open floor plans are popular because they encourage interaction among family and friends. They also can make a smaller home appear larger. Does your family tend to spend a majority of their time in the kitchen? Do you want to make sure that the bedrooms are away from the areas that are most noisy? Do you work from home and need a study, workshop, or workroom? Will your future include taking care of elderly parents or visiting grandchildren? Your builder and architect will then give you their advice and expertise on your floor plan's workability. This is when you start making the real decisions about how your home will look. 5. LIGHTING How much natural light is important to you? Do you want skylights, which can bring in as much as 30 percent more light than vertical windows, to provide light during the winter months? Do you enjoy the morning light coming in your kitchen? Having a plan will allow you to bring in the natural beauty of a forest, mountain, or a body of water. All these decisions reflect the placement of your windows. In your planning of the layout of your rooms, consider drawing in the placement of large items of furniture to help decide the placement of windows. The electrical lighting requires planning, also. Do you want to install bright task lighting for your kitchen countertops, or create a mood with dimming sconces in the dining or bedroom? If you are trying to be green in your overall project, consider energy conservation bulbs and the use of smart systems to conserve energy. Don't forget the landscape lighting, which can add beauty and safety to your home. 6. FEATURES Consider the features that you want in your new home. Prioritize these in order of importance. Here again, visit open houses for ideas of must-have and luxury features. Here is a list of some of the most wanted features in new homes:
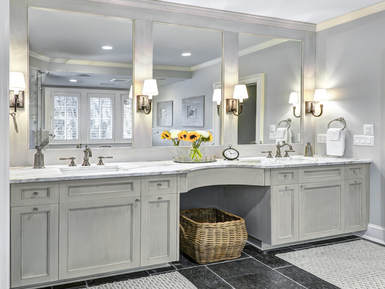
Harper Construction is the expert when it comes to custom home construction and remodeling. Their reputation for fine craftsmanship, attention to detail and strong customer service is reflected in their five-star Houzz rating. Check out www.RenovationIQ.com for home renovation tips and tricks. Learn more about how to select the right contractor for your job and have any questions you have answered. If you found this information helpful click "Like" or "Share" below and post this to your social media pages. Your "Likes" and "Shares" help others like you find the information they need. We are happy for you to re-publish this article on your website or in your company newsletter with credit to Chris Harper Construction as the author and a link to our website http://www.chrisharperconstruction.com/. The URL for this article is http://www.chrisharperconstruction.com/blog/planning-your-dream-home. Email us with any questions. Designing A Beautiful, and Functional BathroomRemodeling a bathroom can be a daunting task. What is the first question you need to ask yourself before getting started? How many people will use this bathroom? How much space do you have to work with? What will need to be replaced? What is your budget? These are all questions to be considered, however, the most important question to ask yourself before getting started is: What is the main function of this bathroom? Do you want a retreat, a spa, a place to soak in a tub and read? Will you spend a couple hours a week with candles and soft music to unwind? Or, do you want a place to shower and run? The choice you pick can affect the materials and colors. Bathrooms are a more personal space than kitchens, according to hgtv.com. Having a working knowledge of what goes into a bathroom remodeling project, all the details, processes, and options, can make the difference between a pleasant experience with a happy ending and a months-long nightmare ending in a not-so-happy result.
Here are some other ideas to consider with your bathroom remodel, according to Forbes Magazine:
Here are some of the most popular surfaces and their pros and cons according to houzz.com:
Bathroom SinksBathroom sinks come in a combination of materials and Styles. Picking the right combination of sink, countertop and faucet can be a time-consuming process.
Sink StylesSink styles include drop-in sink, wall-hung sink, corner sink and undermount sink.
Bathroom Flooring MaterialsBathroom flooring material choices can also range from ceramic tile, cement, marble, laminate, and wood. The right choice is important because you want a material that will hold up under the demands of a wet and humid environment and heavy use.
Below are some of the most common types of flooring choices rated worst to best for bathrooms, according to horizonservicesinc.com
As you can see from the length of this blog, a bathroom remodel involves an endless variety of decisions to be made involving materials to be used and the styles in which to use them. We hope this information is helpful in making these decisions. Harper Construction can provide the expertise needed to answer your questions along with providing fine craftsmanship to your remodeling project. Check out their five-star rating from Houzz. If you found this information helpful, click the "like" and "Share" buttons below. |

